Aug 14, 2026Quality Inspection Guides
What Should You Do When a Pre-Shipment Inspection Fails?
Learn what to do after a failed pre-shipment inspection, how to review defects, discuss corrective action with your supplier, and decide whether re-inspection is needed before shipment.
What Should You Do When a Pre-Shipment Inspection Fails?
You receive the inspection report and the overall result says Fail. The shipping date is approaching, and your supplier says the problems are minor and can be corrected quickly. You now need to decide whether to allow shipment, hold the goods, request correction, or arrange another inspection.
Do not make that decision from the word Fail alone. Start with the exact reason for the result. A failed Final Random Inspection (FRI) or pre-shipment inspection is information for your shipment decision; it is not the decision itself.
First, Identify What Caused the Fail Result
Open the findings, photographs, measurement records, test results, defect table, and conclusion. If the report format is unfamiliar, How to Read a Pre-Shipment Inspection Report explains how the sample size, defect findings, and overall result fit together.
Check whether the failure came from Critical, Major, or Minor defect counts; a failed function or measurement result; incorrect quantity; missing accessories; packaging or labeling errors; or a customer-specific requirement. Each reason points to a different next action.
For example, Shipment A may fail because Major defects exceed the agreed AQL acceptance limit. Shipment B may contain generally acceptable products, but every retail box is missing a required label. Both reports can say Fail, yet one may require product rework while the other may require relabeling the full affected quantity.
Critical, Major, and Minor Defects Explained provides more detail on defect classification. If the failure relates to sampled defect quantities, the AQL Sampling Plan guide shows how the inspected quantity and acceptance or rejection numbers are selected.
A Fail Result Does Not Automatically Reject the Shipment
The inspector records findings against the agreed criteria. You make the commercial shipment decision using those findings together with your product requirements, customer commitments, delivery schedule, and financial risk.
Depending on the issue, you may accept the goods as they are, accept them under an agreed concession, hold shipment, request rework or replacement, ask the factory to separate affected units, or arrange additional verification. There is no single response that fits every failed report.
Read the Defect Description, Not Only the Count
Twenty small cosmetic marks and twenty units with a function failure do not create the same risk. A wrong barcode printed on every retail box may be more disruptive than several isolated workmanship defects because it can affect inventory receiving and order fulfillment across the shipment.
For each finding, ask what the defect changes: safety, function, saleability, customer-facing appearance, assembly, fulfillment, or packaging. Then ask whether it can be corrected without creating another problem and whether the inspection evidence suggests that more goods may be affected.
Decide Whether the Problem Appears Isolated or Systematic
An isolated scratch may affect one sampled unit. Incorrect artwork, a wrong component, a drilling jig set to the wrong position, or the same missing accessory in several cartons may indicate a potentially systematic production or packing problem.
A sampled inspection cannot prove the exact defect rate across every unit. It can show the pattern observed in the selected samples and where those samples came from. If the likely extent remains unclear, targeted checks across additional cartons or factory sorting may be needed before the shipment decision is made.
Ask the Supplier for a Corrective Plan You Can Verify
Once the problem is clear, ask your supplier to describe the proposed correction. A useful plan identifies which goods may be affected, how the factory will find them, what will be reworked or replaced, how corrected goods will be kept separate, and when the work will be completed.
The plan should also state how the result can be checked. 'We will be more careful' does not provide a verification method. 'We will open all cartons from production lot B, replace the incorrect label, mark the corrected cartons, and provide the final quantity' gives you specific points to review.
Rework, Replacement, and Factory Sorting Solve Different Problems
Rework changes a defective product where correction is practical, such as replacing an incorrect label or polishing an acceptable surface defect. Replacement removes an affected unit or component and substitutes a conforming one. Factory sorting checks goods against defined criteria and separates acceptable and unacceptable units.
These actions are performed or arranged by the supplier or factory. The factory must define the sorting criteria clearly enough for its workers to apply them consistently. Afterward, independent verification may be arranged according to the risk and your decision needs; the inspection company does not perform the factory's production rework.
Design the Re-Inspection Around the Known Problem
A re-inspection should not simply repeat the first visit without using what was learned. If wrong labels caused the failure, verify the corrected label, its placement, and the affected cartons. If accessories were missing, check the exact accessory set. If surfaces were scratched during packing, inspect the reworked surfaces and the revised protection method.
Where a full FRI is arranged, the shipment should still be evaluated against the agreed scope. The previously identified defect receives specific attention because the purpose of the second visit is not merely to generate a new report; it is to determine whether the known problem was addressed and whether the shipment now meets the agreed requirements.
Re-inspection is not mandatory after every failure. It is more useful when substantial rework has been completed, several cartons or batches may be affected, the original issue was significant, or your release decision depends on independent evidence. A simple correction may sometimes be verified through another agreed method if the issue and risk allow it.
Increase Sampling Only When It Answers a Specific Question
The first inspection may reveal a risk that justifies additional sampling. If labels varied between cartons, you may request label checks across more cartons. If one hardware bag was incomplete, you may ask for additional accessory counts from the affected SKU or production lot.
AQL provides a standard sampling framework, while additional samples or targeted checks can be agreed for a known concern. More samples are not automatically better. The quantity and selection method should be chosen to answer the specific question that remains after the first report.
A Factory's 100% Check Is Corrective Action, Not Independent Verification
If mixed size labels, missing hardware, or another identifiable defect must be removed from the shipment, the supplier may arrange a 100% factory check. The factory should use written acceptance criteria, record the affected quantity, correct or separate the nonconforming goods, and prevent them from being repacked with acceptable units.
A statement that 'everything has been checked' describes the factory's corrective action. It is not the same as independent verification. Depending on the seriousness and previous pattern, you may decide to arrange another inspection after the factory finishes.
Do Not Let the Vessel Date Make the Quality Decision
The supplier may need to finish correction while a vessel booking or delivery date is approaching. That schedule matters, but it should be considered alongside defect severity, correction status, customer requirements, delay cost, the cost of receiving defective goods, and the possibility of returns or claims.
This does not mean every failed inspection should delay shipment. It means the release decision should be conscious. Record what remains unresolved, what evidence is available, and which risk you are accepting if the goods ship without further verification.
A Practical Example: 3,000 Flat-Pack Bedside Cabinets
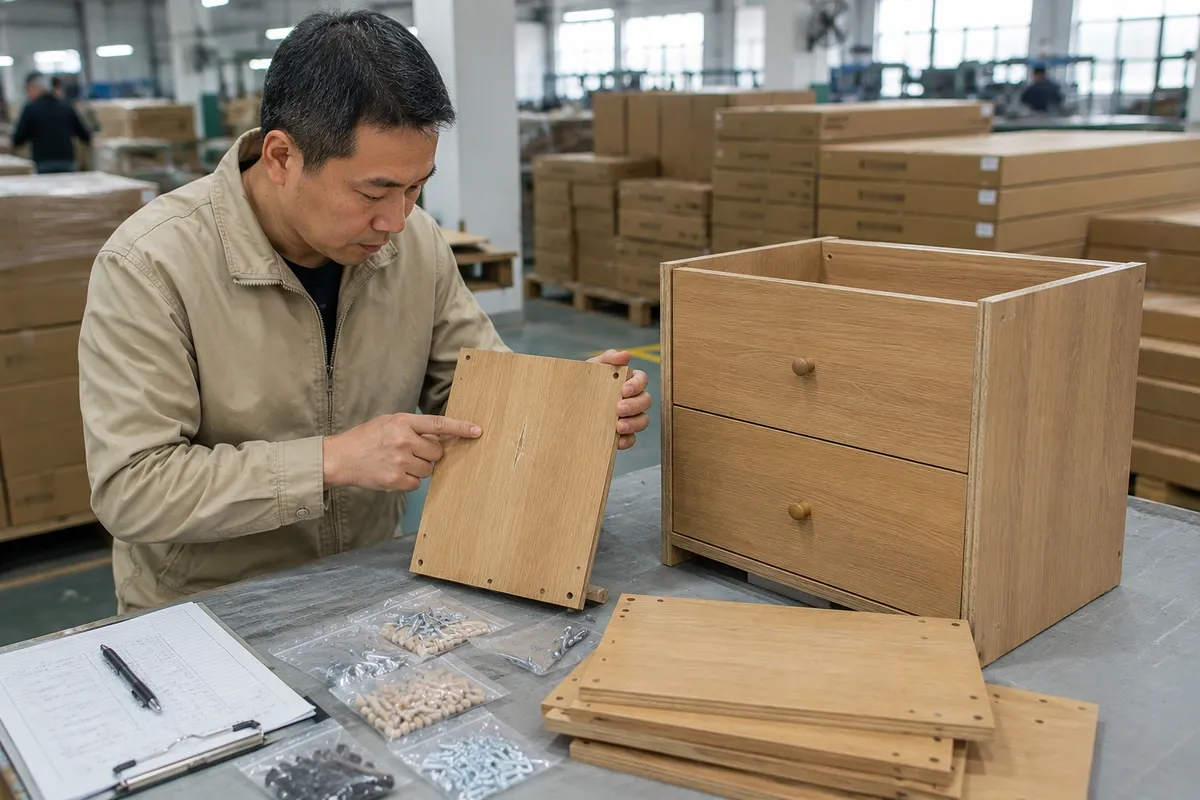
During FRI for 3,000 flat-pack wooden bedside cabinets, selected units show visible scratches on several front panels, missing assembly screws in some hardware bags, and inconsistent drilling positions on part of the sample. The result is Fail under the agreed criteria.
The first step is to separate the findings. Scratched panels affect customer-facing appearance. Incomplete hardware prevents assembly. Incorrect drilling may affect fit and could point to a production setting or jig problem. The drilling issue therefore needs more than a cosmetic repair.
The supplier reviews which production lots used the relevant drilling setup, checks the affected panels, replaces or reworks pieces where practical, replenishes the hardware bags, and improves panel protection before repacking. The factory records which cartons were reopened and corrected.
You then decide whether the factory records are sufficient or whether another visit is needed. If re-inspection is arranged, samples are again selected from the available finished goods. The inspector gives specific attention to front-panel surfaces, hardware completeness, drilling alignment, assembly, and the revised packing protection while following the agreed inspection scope.
The second inspection cannot guarantee that every cabinet is defect-free. It provides new evidence after corrective action, allowing you to compare the remaining risk with your shipment requirements before release.
How GD Inspection Supports the Next Verification Step
When a Final Random Inspection (FRI) identifies problems, GD Inspection records the findings, quantities, locations, photographs, and relevant test or measurement results. You can use that evidence to discuss corrective action with your supplier.
If the supplier later completes correction or rework, another inspection can be arranged where appropriate against an agreed scope. GD Inspection reports the verification findings; it does not approve shipment, force factory rework, guarantee correction, or make your commercial release decision.
It is easier to plan these options when the original inspection requirements are clear. How to Prepare for a Pre-Shipment Inspection explains which references and instructions help the inspector verify the right points before shipment.
Frequently Asked Questions
Does a failed pre-shipment inspection mean I should reject the shipment?
No. Fail is an inspection result. Your shipment decision depends on the actual findings, severity, likely extent, correction options, customer requirements, and commercial risk.
Should the supplier rework all goods after a failed inspection?
Not automatically. The required action depends on the defect and which goods may be affected. A systematic labeling problem may require checking the full affected quantity, while an isolated defect may need a narrower response.
Do I always need re-inspection after correction?
No. Consider the seriousness of the issue, amount of rework, possible extent, available factory evidence, and the importance of independent confirmation to your shipment decision.
Can I request more samples during re-inspection?
Yes, where appropriate and agreed before the visit. Additional sampling should target a defined concern, such as label consistency across more cartons or accessory completeness for an affected SKU.
Who decides whether the shipment can be released?
You do. GD Inspection provides independent findings against the agreed scope. It does not make your commercial shipment decision.
Use the Fail Result to Make the Next Decision
When an inspection fails, identify what failed, evaluate the severity and likely extent, agree on corrective action, and decide whether the correction needs independent verification. The report is most useful when it gives you enough information to make that decision before the goods leave China.